My thought process for creating digital instructions is 2 fold, first everyone should have access to a knowledge base where they can go without being frustrated. Second instructions should be made with and without screenshots incase they need to be printed.
Creating a Meeting in Outlook
With Screenshots
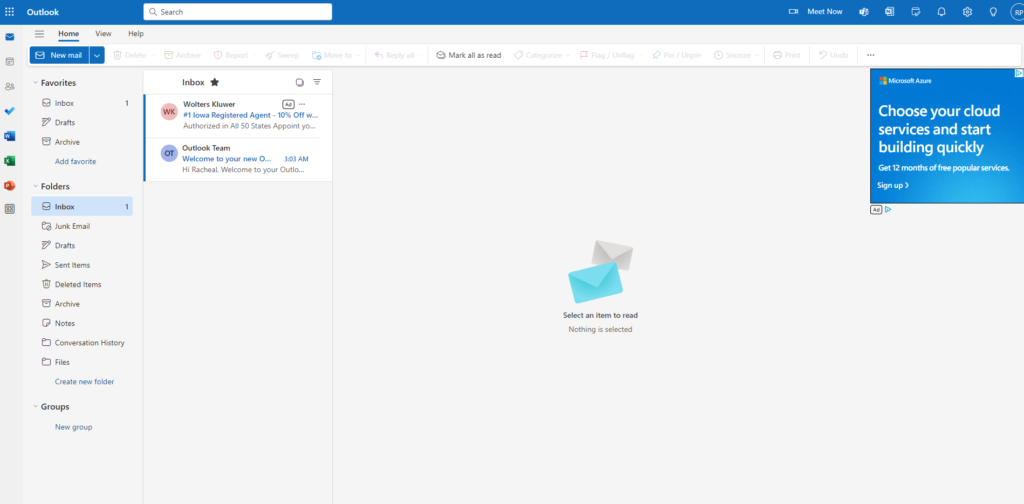
- Open Outlook
- Go to the calendar tab
- On the left hand column, under the small calendar, there is a button that says “Add calendar” click on that
- A window should pop up that asks you to add calendar. I would suggest adding from the directory.
- Once you click add from directory you will select your account
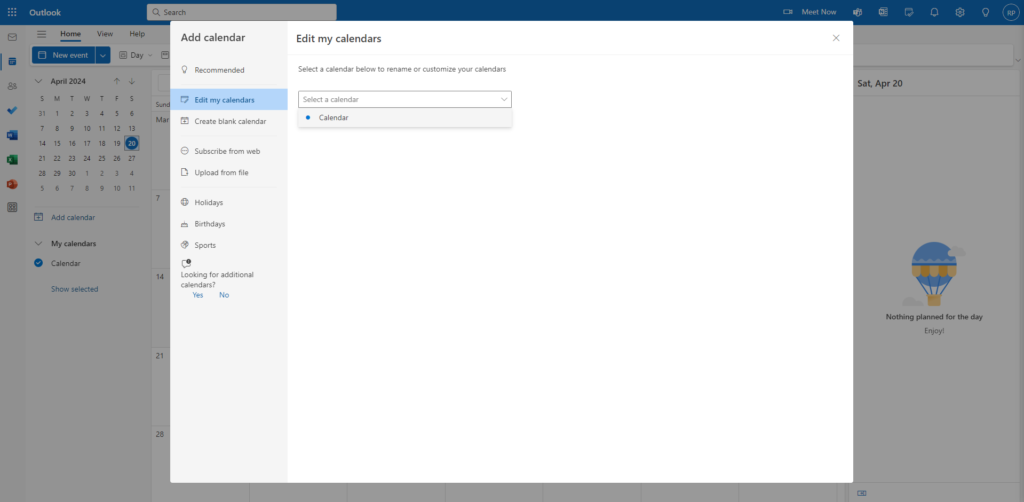
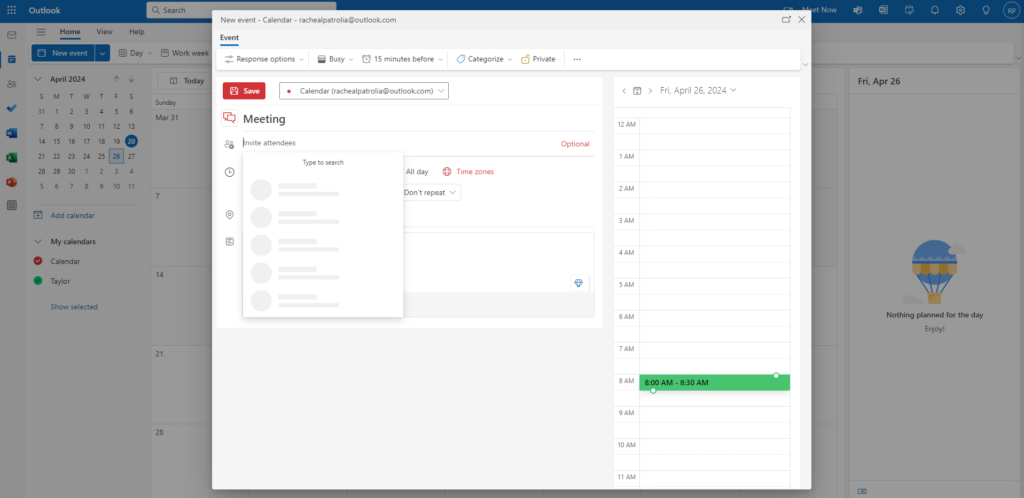
- After selecting your account there will be a search bar that will pop up where you can enter the name of the person who you want to met with.
- Enter in their name and search.
- You should now be able to add them to your calendar.
- Now go back to the main calendar screen. On the left hand side there will be a section with names under it for you to select from. Chose the person who you want to met with.
- You should now be able to see their availability on your calendar. Select a time that works for both of you. You should be able to tell a time that works for both of you as it will be a black spot on the calendar.
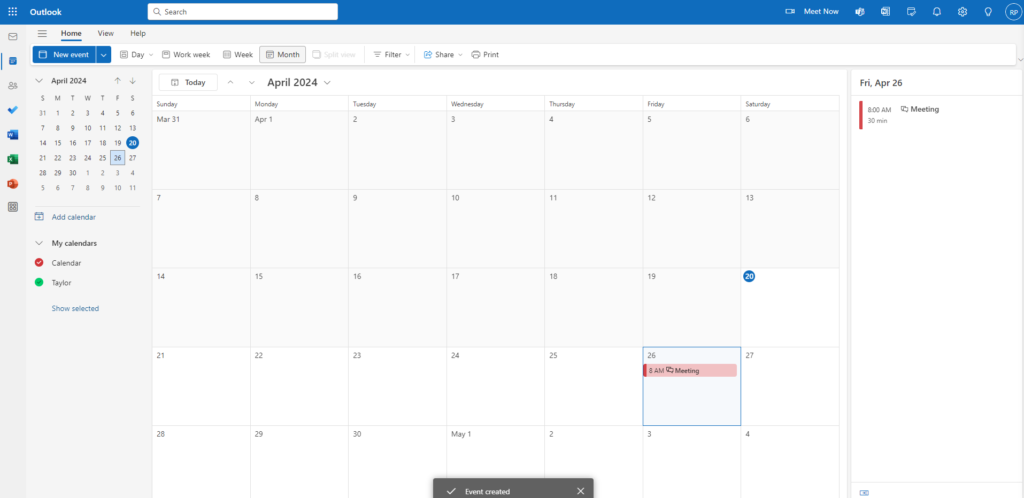
- Once you select a time a box will pop up. Add the person who you want to meet with, the location where you want to meet, and any other important details of the meeting.

Without Screenshots
- Open Outlook
- Go to the calendar tap
- On the left hand column, under the small calendar, there is a button that says “Add calendar” click on that
- A window should pop up that asks you to add calendar. I would suggest adding from the directory.
- Once you click add from directory you will select your account
- After selecting your account there will be a search bar that will pop up where you can enter the name of the person who you want to meet with.
- Enter in their name and search.
- You should now be able to add them to your calendar.
- Now go back to the main calendar screen. On the left hand side there will be a section with names under it for you to select from. Chose the person who you want to meet with.
- You should now be able to see their availability on your calendar. Select a time that works for both of you. You should be able to tell a time that works for both of you as it will be a black spot on the calendar.
- Once you select a time a box will pop up. Add the person who you want to meet with, the location where you want to meet, and any other important details of the meeting.
Requesting an Absence in Workday
With Screenshots
- How to Create an Absence in Workday
- Open Workday
- Once in a workday, you should open the menu. The menu is located on the top left corner.
- Scroll down to find Absence. There will be a little suitcase icon beside it.
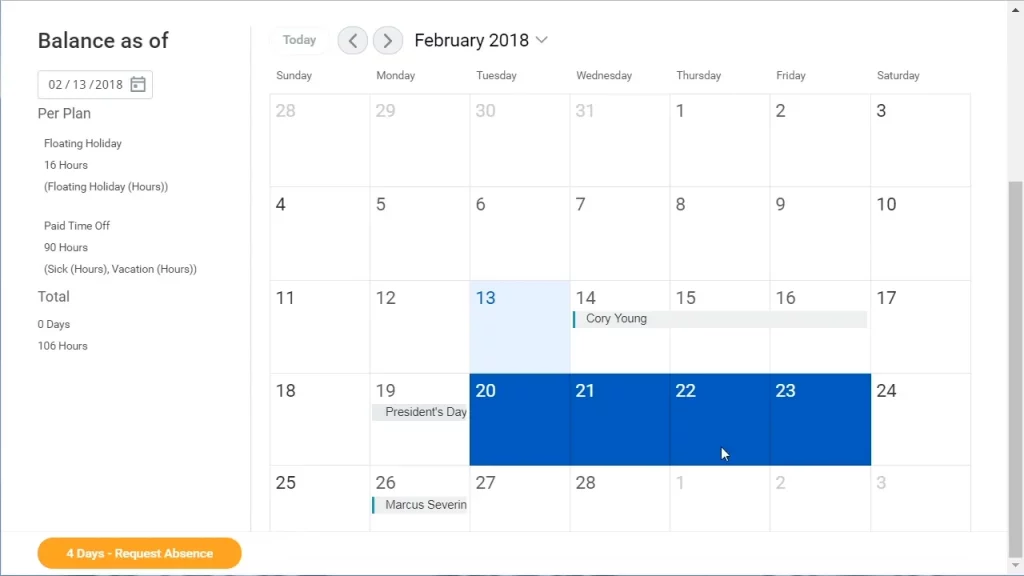
- You will see a calendar pop up. To the left of the calendar will be the days that you have left. You can see the total at the bottom of that column.
- Select the day that you wish to take off in the calendar.
- Click on the day and a button should pop up that says 1 day request.
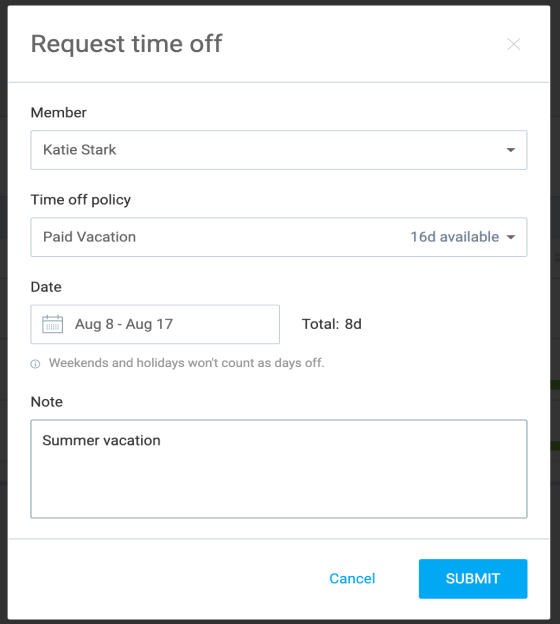
- Hit that button and a box will pop up. It will state the day that you have chosen. You must then select the type of day you want to use, ex vacation, sick, etc.
- Hit the button to confirm.
- You will be brought to a page that shows your absence request.
- That’s it! You’re done!
Without Screenshots
- How to Create an Absence in Workday
- Open Workday
- Once in a workday, you should open the menu. The menu is located on the top left corner.
- Scroll down to find Absence. There will be a little suitcase icon beside it.
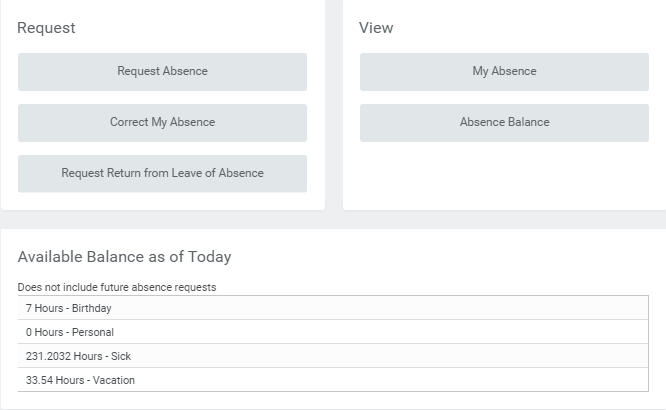
- Once in Absences you should see 3 sections; Request, View, and Available Balance.
- To create an absence you are going to be under the Request section.
- Hit the button that says Request Absence.
- You will see a calendar pop up. To the left of the calendar will be the days that you have left. You can see the total at the bottom of that column.
- Select the day that you wish to take off in the calendar.
- Click on the day and a button should pop up that says 1 day request.
- Hit that button and a box will pop up. It will state the day that you have chosen. You must then select the type of day you want to use, ex vacation, sick, etc.
- Hit the button to confirm.
- You will be brought to a page that shows your absence request.
- That’s it! You’re done!